Welcome

Welcome, thanks to look my blog

Monday 28 April 2014

Setting TCP/IP di windows melalui command prompt


Setting TCP/IP di windows melalui command prompt


Tidak seperti kebanyakan di mesin linux, pengguna windows sudah pasti lebih cenderung menggunakan fasilitas GUI dalam melakukan konfigurasi jaringan TCP/IP, sebetulnya di windows juga kita bisa melakukan konfigurasi menggunakan perintah seperti di linux yaitu melalui command prompt (CMD). hal penting dalam konfigurasi ini kita harus mengetahui nama dari koneksi yang akan kita konfigurasikan. anda bisa mengakses melalui Control panel, Network & internet connections, Network Connections, kemudian terlihat gambar-gambar icon networknya. atau melalui kotak dialog run kemudian ketikan "ncpa.cpl".

Sebagai contoh, kita anggap nama koneksinya adalah "Local Area Connection". memang secara default atau jika anda memiliki satu koneksi interface sudah pasti nama koneksinya adalah "Local Area Connection". Disini kita ingin melakukan konfigurasi sebagai berikut :

IP addres = 192.168.1.3
Subnet mask = 255.255.255.0
Default gateway = 192.168.1.1
DNS server = 202.134.0.61


Setting secara static atau manual

1. buka cmd
2. setting ip addres, netmask, dan gateway

netsh interface ip set address name="Local Area Connection" static 192.168.1.3 255.255.255.0 192.168.1.1 gwmetric=0

3. setting dns server

netsh interface ip set dns "Local Area Connection" static 202.134.0.61

4. finish


Setting secara DHCP (otomatis tcp/ip)

1. buka cmd
2. request untuk ip addres, netmask, dan gateway

netsh interface ip set address name="Local Area Connection" dhcp

3. request untuk DNS server

netsh interface ip set dns "Local Area Connection" dhcp

4. finish


Langkah konfigurasi telah selesai, enable kembali koneksi anda. jika konfigurasi ingin anda simpan, dan suatu saat nanti ingin anda gunakan kembali langkah - langkahnya sebagai berikut :

Menyimpan konfigurasi

1. buka cmd
2. ketikan perintah

netsh -c interface dump > c:\lokasi\namafile.txt


Memanggil konfigurasi

1. buka cmd
2. Ketikan perintah

netsh -f c:\lokasi\namafile.txt

Trick Merubah IP Address Secara Otomatis agar terhubung internet

Trick Merubah IP Address Secara Otomatis agar terhubung internet

Cara Merubah IP Address Secara Otomatis - Sesuai dengan judul postingan kali ini Belajar Komputer akan sedikit membahas terkait merubah IP Address secara otomatis. Postingan ini sendiri diilhami oleh kesibukan kantor yang sangat padat ditambah dengan keinginan teman-teman untuk tetap mengkases internet disela-sela kesibukan mereka, sementara komputer yang mereka gunakan hanya terhubung ke server lokal dan tidak terhubung ke internet. Mungkin diantara sobat bertanya kok demikian, lantas apa kaitannya dengan judul postingan yang saya buat ini.

Sederhana saja, kaitannya adalah IP Address untuk terhubung ke interne berbeda dengan IP Address untuk mengakses aplikasi yang terdapat pada server, sebagai contoh IP Address agar komputer client dikantor saya dapat terhubung ke internet menggunakan alamat 192.168.0.1 dst. sementara IP Address untuk mengakses aplikasi ke server lokal beralamatkan 192.10.10.2 dst. Sekarang jelas bukan. Perbedaan alamat ini sangat merepotkan ketika kita harus mengganti IP Address secara manual, sehingga saya berinisiatif untuk membuat script sederhana untuk mengganti alamat tersebut secara otomatis dan mudah.

Ok sobat berikut ini adalah script yang saya gunakan untuk mengganti IP Address tersebut secara otomatis:

@ECHO OFF
rem Batch untuk ganti IP otomatis

set varip=isi alamat IP (contoh : 192.168.2.2)
set varsm=isikan gateway (contoh :255.255.255.0)
set vargw=isikan alamat gateway (contoh : 192.168.2.1)
set vardns1=isikan DNS1 (contoh : 202.134.0.62)
set vardns2=isikan alternet DNS2 (contoh : 202.134.0.155)
set varhome=isikan alamat URL untuk default Homepage (contoh : http://google.com)
REM untuk update terbaru, kunjungi http://www.andisyam.web.id

ECHO Perubahan IP Address akan berlangsung beberapa saat "http://www.andisyam.web.id"

ECHO Setting IP Address and Subnet Mask
netsh int ip set address name = "Local Area Connection" source = static addr = %varip% mask = %varsm%

ECHO Setting Gateway
netsh int ip set address name = "Local Area Connection" gateway = %vargw% gwmetric = 1

ECHO Setting Primary DNS
netsh int ip set dns name = "Local Area Connection" source = static addr = %vardns1%

ECHO Setting Secondary DNS
netsh int ip add dns name = "Local Area Connection" addr = %vardns2%

ECHO Setting Internet Explorer Homepage to %varhome%
reg add "hkcu\software\microsoft\internet explorer\main" /v "Start Page" /d "%varhome%" /f

rem ECHO Here are the new settings for %computername%:
rem netsh int ip show config

pause

Untuk penerapannya, silahkan copy kemudian pastekan pada notepad kemudian simpan dengan nama apa saja dengan extention file *.bat kemudian klik 2x file bat tersebut hingga muncul seperti gambar berikut :
Cara Merubah IP Address Secara Otomatis

Jika sobat ingin mengganti kembali ke alamat semula cukup copy paste file pertama yang sudah jadi kemudian rubah nama file serta alamat IP Addressnya. Sekian dahulu, semoga artikel kali ini bermanfaat.

Sunday 27 April 2014

Cara Mempercepat Koneksi Internet dengan ping cmd

~Cara Pertama.  


                                            Cara Mempercepat Koneksi Internet 
  • start >all programs >acsesoris> run lalu ketik cmd pada kotak dialog atau tekan keyboard Logo Windows + R untuk membuka Run.lalu ketik cmd
  • Ketik ipconfig/all kemudian tekan enter.
  • lihat gambar dibawah ini adalah DNS SERVER yang nantinya akan kita gunakan jadi silakan anda catat DNS server anda di notepad


  • ketik ping -l 500 (isi dengan kode DNS servers) -tKemudian tekan enter.
jangan tutup  CMD  anda jika anda ingin  Mempercepat Koneksi Internet.


~Cara Kedua

Cara Mempercepat Koneksi Internet melalui  CMD teknik 1

  • Buka CMD dengan cara klik start-run dan ketikan CMD baca disini jika belum tau caranya membuka CMD
  • Jika sudah membuka CMD ketikan  perintah ipconfig /all pada layar CMD 
  • Cari DNS Servers, bila perlu catat. misal DNS servers-nya 8.8.8.8 maka buatlah perintah di cmd
  • ping -l 50000 8.8.8.8 -t
  • jika sudah melaukkan langkah diatas .Biarkan saja CMD berjalan dan jangna di close cukup anda minimimze 
 Cara Mempercepat Koneksi Internet melalui  CMD teknik 2 


  • buka CMD sebagai administrator ( Comand prompt ) 
  • setelah terbuka ganti alamatnya ke drive "C:\" , caranya ketik " cd C/ " lalu Enter
  • sekarang ketik perintah berikut netsh interface tcp set global autotuning=disabled

Cara Mempercepat Koneksi Internet via  CMD
-Ping 8.8.8.8 -t -l 1

-Ping www.google.com -t
-Ping www.youtube.com -t

sumber : http://signal-graph.blogspot.com/2013/12/mempercepat-koneksi-internet-dengan.html

Wednesday 23 April 2014

Tutorial Setup MySql-Front + Aktifasi Register Key


Kali ini saya ingin berbagi tentang bagaiman cara setup MySql-Front 5 dan cara aktifasi register key-nya. Sebenarnya sangat mudah sekali, tetapi buat para pemula saya yakin ini lumayan penting untuk dibaca..buat yang udah ahli..monggo dilewatkan saja..

1. Pastikan anda sudah punya mentahan MySql-Front 5, Jika belum Download disini
2. Ekstrak file, lalu klik 2x pada file apps-nya.


3. Klik Next


4. Klik Next


5. Klik Next

6. Biarkan default seperti images diatas, lalu Next

7. Klik Install

8. Settup MySql-Front selesai, Klik Finish

9. Untuk dapat menggunakan fungsi software ini, diharuskan pada PC anda sudah terinstall host-local ( contoh : Xampp ) yang memungkinkan SQL dapat berjalan/berfungsi aktif.

10. Buka MySql-Front, lalu aktifkan register key-nya agar MySql-front yang sudah anda setup tidak 
      expired.
     - Caranya klik 'Help' pada bar bagian kanan atas menu utama.
     - Kemidian klik 'Register'
     - Copy Paste code dibawah ini.

SctE+QVh4jWSLKwXOCLRgxNJOECL
 CGBEuKcSi8SabkOMeBWayZeIPR0P
 L07PXE9Aan8UDfrORQRc9AtD0+H9
 Yfr14WDSwjPXtIyTxy1gY4zdfIEv
 M9tmJiBS6Bl7ST1Da8Qh/CUJMXii
 Pb8Ch3KaGwsRTP0H+c3YGlsL2cZE
 pz1M4714S8DecKveWbxupPxgkUbv
 6Sih3Wx7Fk64VKrBkC0OCt3RgJUb
 ZgafPz2xZyUBZ4HdpYaptl+yWyDq
 0uRMgq5npAogTrp2VJSppeLEXQ=

ATAU

U01vK6mvJcWLSrUK/pOLG6hzCnel
 OoVqu6dQctkr1VIf6OI3kSHPKSza
 6m/XVlaEMlEDrqTSQQDYhw1NnQ24
 j4SBrWgkI2hOkFHqEoZJ2DmtWEmL
 y7FYT389gpUOaY0C4HxCTaMiu2V3
 DciH3Fw/W8zo4wMtqm3trDVDppRI
 8FSK+SwK+bBmW71v+S/yPDpfKZ5g
 d3d+9ZHVna1nCDUMVQ+qqdPQJlB0
 Tq+JSfJpl3mAeVZetrTZixqqPbdH
 ZoxHQxsbtDrTua0wjNXGIGBUHQ=

     - Kemudian Klik Ok

11. Selamat mencoba

Jika bermanfaat, jangan lupa untuk tinggalkan komentar anda,semoga bermanfaat.


sumber : http://adikurniadi1985.blogspot.com/2012/02/dunia-it-tutorial-setup-mysql-front.html

How to Enable or Disable Regedit in Vista and Windows 7


OPTION ONE

Enable or Disable Regedit Using a VBS File Download

NOTE: This VBS script will toggle Registry Editor to be enabled or disabled when runned. If regedit was disabled before running the VBS script, then it will be enabled automatically. If regedit was enabled before running the VBS script, then it will be disabled automatically
1. Click on the Download button below to download the .vbs file below.
Enable-Disable_regedit.vbs
download
2. Click on Save, and save the .vbs file to your desktop.

3. Open an elevated command prompt.

4. In the elevated command prompt, copy and paste the command below and press Enter. (see screenshot below)
cd /d %userprofile%\desktop

Regedit - Enable or Disable-elevated_cmd.jpg
5. In the elevated command prompt, copy and paste the command below and press Enter. (see screenshot above)
wscript.exe Enable-Disable_regedit.vbs
6. Click on OK. (see screenshots below)
Name:  OK-2.jpg
Views: 48937
Size:  19.9 KBName:  OK-1.jpg
Views: 47103
Size:  19.9 KB
7. Close the elevated command prompt window.


OPTION TWO

To Disable Regedit Using a REG File Download

WARNING: Once you disable regedit, you will not be able to enable regedit again through the registry or from a REG file. See OPTION ONE or OPTION FOUR to be able to enable regedit again.
Disable regedit from running silently?

1. To Disable Regedit and Allow Silent Mode
NOTE: See NOTE at the top about Silent Mode.
A) Click the download button below to download the file below.
Disable_Registry_No_Silently.reg

download
B) Go to step 3.
2. To Disable Regedit and Prevent Silent Mode
NOTE: See NOTE at the top about Silent Mode.
A) Click the download button below to download the file below.
Disable_Registry_Yes_Silently.reg
download
3. Click on Save, and save the .reg file to the Desktop.

4. Right click on the downloaded .reg file and click on Merge.

5. Click on Run, Continue (UAC-Vista) or Yes (UAC-Windows 7), Yes, and then OK when prompted.

6. When done, you can delete the .reg file (on Desktop).


OPTION THREE

To Manually Disable Regedit Using Registry Editor

WARNING: Once you disable regedit and close the registry, you will not be able to enable regedit again through the registry or from a REG file. See OPTION ONE or OPTION FOUR to be able to enable regedit again.
1. Open the Start Menu, then type regedit and press Enter.

2. If prompted by UAC, click on Continue (Vista)or Yes (Windows 7).

3. In regedit, navigate to the location below. (See screenshot below step 5)
NOTE: If you do not have System, right click on Polices, click on New and Key, then type System and press Enter.
HKEY_CURRENT_USER\Software\Microsoft\Windows\CurrentVersion\Policies\System
4. To Disable Regedit
A) In the right pane, right click on a empty area and click on New and DWORD (32-bit) Value. Type DisableRegistryTools and press Enter. (See screenshot below step 4)
5. Right click on DisableRegistryTools and click on Modify. (See screenshot below)
Regedit - Enable or Disable-registry.jpg
Disable regedit from running silently?

6. To Disable Regedit and Allow Silent Mode
NOTE: See NOTE at the top about Silent Mode.
A) Type 1 and click on OK. (See screenshot below step 7A)
7. To Disable Regedit and Prevent Silent Mode
NOTE: See NOTE at the top about Silent Mode.
A) Type 2 and click on OK.
Regedit - Enable or Disable-modify.jpg
8. Close regedit.


OPTION FOUR

Enable or Disable Regedit Using Local Group Policy Editor

1. Open the all users, specific users or groups, or all users except administrators Local Group Policy Editor for how you want this policy applied.

2. In the left pane, click on User Configuration, Administrative Templates, and System. (See screenshot below)
Regedit - Enable or Disable-group_policy.jpg
3. In the right pane, right click on Prevent access to registry editing tools and click on Properties. (See screenshot above)

4. To Enable Registry Editor
A) Select (dot) Disabled or Not Configured and click on OK. (See screenshot below 5D)
B) Go to step 6.
5. To Disable Regestry Editor
A) Select (dot) Enabled. (See screenshot below 5D)

Disable regedit from running silently?
NOTE: See NOTE at the top about Silent Mode.

B) To Allow Silent Mode - Select No. (See screenshot below 5D)

C) To Prevent Silent Mode - Select Yes. (See screenshot below 5D)

D) Click on OK. (See screenshot below)
Regedit - Enable or Disable-properties.jpg
6. Close the Local Group Policy Editor window. Your done

Enable Registry Editor disabled by Administrator or Virus

Enable Registry Editor disabled by Administrator or Virus

Registry Editor is a useful utility in Windows which allows users to easily change advanced Windows settings by altering registry keys present in a hierarchical arrangement called the Windows Registry. Despite being such a powerful tool, Registry Editor is not totally error-proof.

A simple virus infection is all it takes to render it useless. Or, there are times when your administrator has actually disabled Registry Editing. When you try to open the Registry Editor in one such computer, you are likely to receive the“Registry editing has been disabled by your administrator” error. Due to this error, it is impossible to remove this restriction using Registry Editor itself.

Enable Registry Editor
Windows Registry Editor

This article suggests some workarounds for re-enabling Registry editing in a computer running Windows XP, Windows Vista, Windows Server 2003/ 2008, Windows 7 or Windows 8.

Enable Registry Editor Using Group Policy Editor

  1. Click on Start. Go to Run. Users running Windows 8, Windows 7 or Vista, go to Search.
  2. Type gpedit.msc and press Enter.
  3. Navigate to User Configuration/ Administrative Templates / System.
  4. In the work area, double click on "Prevent Access to registry editing tools".
  5. In the popup window, encircle Disabled and click on OK.
  6. Normally, Registry Editor will be immediately accessible. If it is not, restart your PC.
Group Policy Editor is not available on home editions of Windows.

Enable Registry Editor
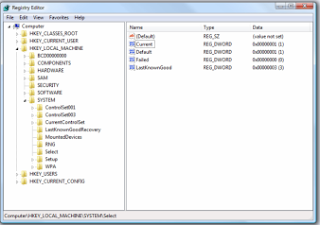
Getting access to Registry Editing

Related: Enable Task Manager disabled by Administrator or Virus

Enabling Registry Editor using UnHookExec.inf from Symantec

Symantec has created a small .inf file which can be installed to remove restrictions on modifying registry keys at the click of a mouse. Most viruses, spywares, Trojans or worms normally affect the shell\open\command keys which allows them to run each time when a file of specific type is executed. Normally, they associate their execution with .exe files. UnHookExec.inf not only enables registry editing but also removes such associations.

Just save UnHookExec.inf and install it by right clicking and selecting install. Installing the file will not show any popup or notice box.

Enable Regedit by simply running a CMD Command

  1. Open Notepad.
  2. Copy the code given below and paste it.
  3. reg add "HKCU\Software\Microsoft\Windows\CurrentVersion\Policies\System" /t Reg_dword /v DisableRegistryTools /f /d 0
  4. Save the file as EnableRegistry.bat. Run this file as Administrator if you use Windows 8, Windows 7 or Windows Vista. In Windows XP, simply open the file. CMD will flash for a second and then disappear. This indicates successful execution.
  5. Log Off and Log Back On.

Visual Basic Script to Enable/ Disable Registry Editor

Doug Knox has created a VBS Script which allows users  to easily enable and disable Registry Editor. Just download regedit tools.vbs and double click on it. This script reverses the current state of Registry Editor. If registry editing is set to enabled, this script will disable it and if it is disabled, it will enable it.

If the above link does not work, copy the code given below in Notepad and save the file as *.vbs or Registry Editor.vbs.

Option Explicit
Dim WSHShell, n, MyBox, p, t, mustboot, errnum, vers
Dim enab, disab, jobfunc, itemtype
Set WSHShell = WScript.CreateObject("WScript.Shell")
p = "HKCU\Software\Microsoft\Windows\CurrentVersion\Policies\System\"
p = p & "DisableRegistryTools"
itemtype = "REG_DWORD"
mustboot = "Log off and back on, or restart your pc to" & vbCR & "effect the changes"
enab = "ENABLED"
disab = "DISABLED"
jobfunc = "Registry Editing Tools are now "
t = "Confirmation"
Err.Clear
On Error Resume Next
n = WSHShell.RegRead (p)
On Error Goto 0
errnum = Err.Number
if errnum <> 0 then
WSHShell.RegWrite p, 0, itemtype
End If
If n = 0 Then
n = 1
WSHShell.RegWrite p, n, itemtype
Mybox = MsgBox(jobfunc & disab & vbCR & mustboot, 4096, t)
ElseIf n = 1 then
n = 0
WSHShell.RegWrite p, n, itemtype
Mybox = MsgBox(jobfunc & enab & vbCR & mustboot, 4096, t)
End If
After running the VBS file, if Registry Editing is not enabled, try restarting your PC.

How to Enable or Disable the Command Prompt in Vista and Windows 7


EXAMPLE: Command Prompt Enabled
NOTE: The top screenshot is the normal command prompt, and the bottom screenshot is an elevated command prompt.

Command Prompt - Enable or Disable-cmd_prompt_enabled.jpg
Command Prompt - Enable or Disable-runas_cmd_prompt_enabled.jpg
EXAMPLE: Command Prompt Disabled
NOTE: You will see this message from both command prompts above when set as disabled.
Command Prompt - Enable or Disable-command_prompt_disabled.jpg


OPTION ONE

Using a REG File Download

1. To Enable Command Prompt and Scripts
NOTE: This is the default setting.
A) Click on the download button below to download the file below.
Enable_Command_Prompt_and_Scripts.reg

download
B) Go to step 4.
2. To Disable Command Prompt Only and Allow Scripts
A) Click on the download button below to download the file below.
Disable_Command_Prompt.reg

download
B) Go to step 4.
3. To Disable Command Prompt and Scripts
WARNING: Do not prevent (disable) the computer from running batch files (Command Scripts) if the computer uses logon, logoff, startup, or shutdown batch file scripts, or for users that use Terminal Services. They will not work afterwards if you do.
A) Click on the download button below to download the file below.
Disable_Command_Prompt_and_Scripts.reg

download
4. Click on Save, and save the .reg file to the Desktop.

5. Right click on the downloaded .reg file and click on Merge.

6. Click on Run, Continue (UAC-Vista) or Yes (UAC-Windows7), Yes, and then OK when prompted.

7. When done, you can delete the downloaded .reg file if you like.


OPTION TWO

Through the Local Group Policy Editor

1. Open the all users, specific users or groups, or all users except administrators Local Group Policy Editor for how you want this policy applied.

2. In the left pane, click on User Configuration, Administrative Templates, and System. (See screenshot below)
Command Prompt - Enable or Disable-group_policy.jpg
3. In the right pane, right click on Prevent access to the command prompt and click on Properties. (See screenshot above)

4. To Enable the Command Prompt and Scripts
A) Select (dot) Disabled or Not Configured and click on OK. (See screenshot below 5C)
NOTE: Not Configured is the default setting.

B) Go to step 6.
5. To Disable the Command Prompt
A) Select (dot) Enabled.

B) Select Yes or No from the drop down menu to Disable or Allow Command Scripts (.cmd and .bat files) to still run.
WARNING: Do not prevent (disable) the computer from running batch files (Command Scripts) if the computer uses logon, logoff, startup, or shutdown batch file scripts, or for users that use Terminal Services. They will not work afterwards if you do.

C) Click on OK.
Command Prompt - Enable or Disable-properties.jpg
6. Close the Local Group Policy Editor window. Your done.


OPTION THREE

Manually in Registry Editor

1. Open the Start Menu, then type regedit in the search box and press Enter.

2. If prompted by UAC, then click on the Continue (Vista) or Yes (Windows 7).

3. In regedit, navigate to the location below. (See screenshot below)
NOTE: If you do not have System in the left pane, then right click on Windows and click on New and Key. Type System and press Enter.
HKEY_CURRENT_USER\Software\Policies\Microsoft\Windows\System
Command Prompt - Enable or Disable-reg1.jpg
4. To Disable the Command Prompt
A) In the right pane, right click on a empty area and click on New and DWORD (32-bit) Value. (See screenshot above)

B) Type DisableCMD and press Enter.

C) Right click on DisableCMD and click on Modify. (See screenshot below)
Command Prompt - Enable or Disable-reg2.jpg

D) To Disable Command Prompt Only and Allow Scripts
  • Type 2 and click on OK. (See screenshots below)
Command Prompt - Enable or Disable-modify2.jpg

Command Prompt - Enable or Disable-reg4.jpg
E) To Disable Command Prompt and Scripts

WARNING: Do not prevent (disable) the computer from running batch files (Command Scripts) if the computer uses logon, logoff, startup, or shutdown batch file scripts, or for users that use Terminal Services. They will not work afterwards if you do.
  • Type 1 and click on OK. (See screenshots below)
Command Prompt - Enable or Disable-modify1.jpg

Command Prompt - Enable or Disable-reg3.jpg
F) Go to step 7.
6. To Enable Command Prompt and Scripts
NOTE: This is the default setting.
A) In the right pane, right click on DisableCMD and click on Delete. (See screenshot above)

B) Click on Yes to confirm deletion.
7. Close regedit.
 
 
sumber : http://www.vistax64.com/tutorials/152934-command-prompt-enable-disable.html

How-to Enable And Disable Task Manager In Windows 7

1. First Go to Start >>all program >>Accessories >>Run or (keyboard shortcut) Window+r.
2. Now write down gpedit.msc.

3. After this a windows will open of Local Group Policy Editor.
4. Now follow this path User configuration >> Administrative Templates >>System.
5. Click Crtl+Alt+Del Options.
6. Click “Remove Task Manager”.
7. Now A window will open for edit the options of enable and disable .
Second Method :
1. Go to “Start” and write “regedit” in search box.
2. Open the path   HKEY_CURRENT_USER\Software\Microsoft\Windows\Current Version\Policies\System.
3. Now right click on system and create a new 32-bit DWORD value and named it DisableTaskMgr.
4. Now Double click on it and set its value data to zero (0) for enable  and One (1) for disable.

sumber : http://tech.mobiletod.com/how-to-enable-and-disable-task-manager-windows-7/